When first looking at how much insulation to put into the house, I looked to the Passive House certification system. To get Passive House certification, there is a hard limit on the amount of energy needed to heat and cool a space of 15 kWh/m² per year, which works out to about 1/10th the amount that a typical house uses. It turns out that this is a very difficult bar to meet in cold climates, with the amount of insulation required being simply immense. With a house like ours it would have required walls roughly 2 feet thick (instead of the 6-8" that are typical of current construction. After doing a bit of math, it didn't seem like this was an investment that would ever pay off, so instead we only took inspiration from the Passive House ideals, rather than attempting to meet them. We still ended up with a wall assembly roughly 15" thick, trying to balance cost and efficiency.

Another heuristic that I picked up from our architect is the 60-40-30-20 rule. This suggests putting R-60 insulation in the ceiling, R-40 in above grade walls, R-30 in basement walls, and R-20 underneath the basement slab, which is much closer to what we actually did. I've elsewhere heard referred of concepts similar to this, labeled as "the pretty good house". While a house like this won't reach that Passive House standard, it will still cut by half or two thirds the amount of energy needed to heat and cool a home.

For those of you familiar with reading building plans, I have put up the final house plan with all building details, here. These seem to not often be shared, but I am not too concerned about someone copying our home; if you would like to borrow any details, please do so.
Starting from the top, we built a cathedral ceiling using a single pitched shed-style roof. We used manufactured trusses with 3' of depth built in for insulation. Into this space a layer of 3.5" Roxul batt insulation was laid down covering the entire bottom of the ceiling cavity. Loose cellulose insulation was then blown in above, mostly filling the 3' space, reaching an estimated R-80 for the ceiling. It was originally specified to be R-60, but there was enough space for more insulation, and cellulose is relatively cheap and easy to install, so a last minute upgrade was done during installation. With the energy modeling that we did after the house was complete, it turns out that the R-60 would have been sufficient, as only a very small proportion of the heat loss would have been through the roof even with R-60. Beneath the rest of the insulation was a standard polyethylene air and vapor barrier, preventing air movement and controlling water movement. The final interior layer is veneer plywood sheets that make for a very attractive ceiling to the room below.
For the above-grade walls, we ended up using a double stud wall assembly. The structure of the house is built with 2x8 lumber, which allowed both for necessary support on the tall wall in the upstairs, as well as to give a deep space for insulation. The bays in this wall were filled with Roxul batt insulation, a mineral wool product. Mineral wool is a quite well regarded insulation, as it is very pest, water, and fire resistant, is easy to install, and holds its shape well, all leading to good long service. On the inside of this 2x8 wall is the polyethylene air/vapor barrier. Inside of that is a 2x4 utility wall, holding all of the electrical, plumbing, and data cabling. This wall is also insulated with Roxul insulation. Finally, a standard layer of sheetrock provides the interior walls. A big advantage of the utility wall is that all of the openings that need to be cut, for outlets, fixtures, etc., don't need to punch holes in the air barrier, keeping the air tightness higher. Outside of the 2x8 wall, there is a layer of plywood, then 1.5" of Roxul comfortboard, which is very similar to the batt insulation we used, but a firmer and coming in sheets. By wrapping all the walls in mineral wool, it prevents thermal bridging, where heat would pass through the wood framing (which is a poor insulator compared to the insulation it holds in place). Finally, the exterior has 1x3 wooden strapping to allow for air circulation and water drainage, on which Hardie brand cement board is mounted. Altogether these walls are a nominal R-47.
For the below grade walls, which are about 5-6' tall around two sides of the walkout basement, the final assembly was a simpler one. From the outside, there was a 2" thick layer of rigid EPS (expanded polystyrene) foam, with a 4' wide skirt of the same material buried approximately one foot below the outside ground surface. This skirt reduces the ability of cold winter temperatures from passing through the soil to reach the lower walls and foundation of the house. Essentially, the cold is slowed down as it has to go through or around that skirt. Inside of the 2" of foam, there is a waterproof membrane stuck to an 8" thick poured concrete wall. Inside of the concrete wall is another layer of 4" EPS foam, with the polyethylene barrier to the inside. The final layer is the same 2x4 utility wall mentioned above, covered by drywall. This total assembly measures R-40.

Underneath the basement concrete slab is 4" inches of rigid foam, giving R-16. A couple other finishing details really help to reduce the basement heating loads. First, the basement concrete slab is actually encased on 3 sides by foam, coming down from the walls, and then with the foam underneath - it essentially looks like a foam 'bathtub'. This significantly reduces thermal bridging, making the diffusion of heat into the ground or concrete walls slower.
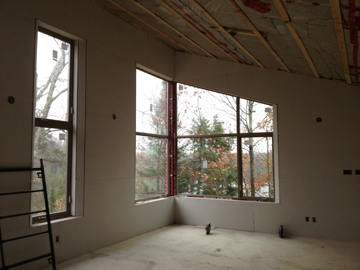
All the windows in the house have fiberglass frames, are triple paned with argon fill, and have an insulating value of roughly R-5. The windows facing south are all chosen to allow in more of the sun's heat (called solar heat gain coefficient, SHGC), whereas windows facing all other directions have a low SHGC. The difference between them is that the high gain windows allow in approximately 50% of the sun's heat, whereas the low SHGC windows let in only about 30%. The interesting thing about passive solar design is that much of the heating load is carried by the heat coming in the windows, with energy modeling suggesting that about 30% of the house's total heat needs are being provided by the sun shining through the windows.
The final thing that always needs to be mentioned when discussing a building envelope is air-tightness. There used to be ideas floating around that a house needed to 'breathe', but these ideas have long since been discredited, and high quality builders now look to build houses as tightly as possible, then actively bring in fresh air with a device like a heat recovery ventilator (HRV). Airtightness is meaured in air changes per hour (ACH), which measures the total volume of air inside a building, and how many times in one hour that this much air would be replaced when a home is slightly depressurized with a big fan. Old leaky homes may have a number like 10 ACH (or even much higher), meaning that the air inside is replaced by outside air about 10 times each hour when depressurized. Passive house rules require .6 ACH. Our house, with the polyethylene barrier mentioned multiple times above, measured at 1.47 when the house was half done, the outer 2x8 wall in place with the air barrier. The house is probably much tighter than that now that the utility wall, sheetrock, paint, and caulking are all in place, but we never quite got around to getting a second measurement after the house was complete.
Another way to get a feeling for how this house is put together would be to watch this time lapse video of the day a crane was used to put up the walls and set the ceiling trusses in place (video created by our builder Stephane Charette of Bala Structures - he is the one singing as well).
Other building assemblies
I must say that there is a lot of interesting work going on by high-efficiency builders trying out quite a lot of ways to build very high efficiency homes that are simpler and cheaper. Even now, less than 2 years after our house was completed, there are already some things that we could change to simplify and make cheaper the house that we built. A lot of this sort of work shows up at the Green Building Advisor website, which I have become a frequent reader of. One other example comes from Ecohome, where our LEED certifier Mike Reynolds works. Their recent Edelweiss House is significantly more efficient than our home, and was also cheaper to build, as they did it with only a standard 2x6 wall and lots of exterior insulation. Needless to say, though the house that we have built is a very good one, there are many good ways to put together a high performance building envelope.
The 60-40-30-20 rule is a good medium between cost and efficiency. Insulation like that also gives a great temperature balance to the way the home is designed. Building a home off the grid is difficult enough but making a home properly insulated at the same time is no small feat.
ReplyDelete